Getting started with Bluetooth Low Energy development
Introduction
Bluetooth Low Energy (BLE) has been in the news a lot lately, as it’s the wireless technology behind all the coronavirus contact tracing applications. The news prompted me to get back into messing around with BLE, so as a fun lockdown development task we have started a couple of BLE projects using one of the popular, cheap (£38 on Mouser) development boards that supports BLE. This blog is designed to help others get going with BLE development, producing firmware to run on the board itself. The same board can also be used to capture BLE traffic and view it in Wireshark, and there are some demo desktop applications.
For an explainer on the BLE protocol, see this blog I wrote in a previous incarnation. For analysis of the UK’s tracing application, see the various releases from the NCSC. A similar application of BLE to contact tracing include Apple’s new device tracking mechanism, covered in detail in this Wired article.
Getting started with the nRF52840 DK
This blog provides a guide to getting started with programming BLE applications on the Nordic Semiconductors Development Kit for the nRF52840 System-on-Chip, using the free Mbed Studio IDE from ARM. Running a 32-bit ARM Cortex-M4 CPU, the nRF52840 has support for “Bluetooth 5, Bluetooth mesh, Thread, Zigbee, 802.15.4, ANT and 2.4 GHz proprietary stacks“. The Development Kit has LEDs, buttons and General Purpose IO aplenty.
More importantly, it can be programmed over a regular USB connection, meaning you don’t need any specialist hardware kit to get started programming with the board. The DK runs two levels of firmware: a bootloader and a firmware stack that comprises the custom application and one of the existing IoT platforms, either the Nordic OS or ARM’s Mbed OS.
The alternative would have been the equivalent from Texas Instruments, which are based on the CC2541 chip.
Development options
There are a few options for programming the nRF52840 DK, in terms of both language and development tools. You can develop native applications in C++, using either Keil and the Nordic software stack (“soft device” in their terminology), or using an Mbed IDE and the Mbed OS.
If you want to avoid C++, and I get why you would, Nordic Semiconductors also support Python and Javascript bindings that replicate the SoftDevice C++ API, allowing you to write in Python but with the same support from the Nordic library. For more information see this high-level overview. For this blog, we’ll cover writing C++ firmware using the Mbed framework.
ARM Mbed
ARM Mbed is a rapid prototyping framework for IoT development, which supports all the nRF boards and has lots of public example projects. It’s been used for a whole range of actual IoT products. There are two ways of writing applications, both of which use C++ and require a free Mbed account. Firstly, this online Mbed compiler allows you to develop and compile an application from the browser. Building the application downloads the binary, which can be copied on to a board to program it. Alternatively, Mbed Studio is a relatively new desktop IDE, which seems to have the same functionality as the online compiler, but can also program a connected device with the build binary.
Introducing Mbed Studio
We used Mbed Studio for this work. As an IDE, it’s maybe not the best, but is perfectly functional and has everything you need to get going quickly. That certainly is true compared to the alternative desktop solution, ARM’s Keil IDE, which can be daunting for anyone unfamiliar with embedded development. There is a getting started guide to Mbed Studio on maker.pro, and a fuller guide available on these ARM pages, but let’s cover the basics here.
First plug the development kit into your computer. Mbed Studio should detect a compatible target and prompt to connect:

Once connected, the current target device is displayed underneath the program:

The libraries panel (panels are toggled from the View menu) shows the current project libraries, and allows you to add additional libraries. You can paste in the GitHub URL, and it can also find existing Mbed libraries.

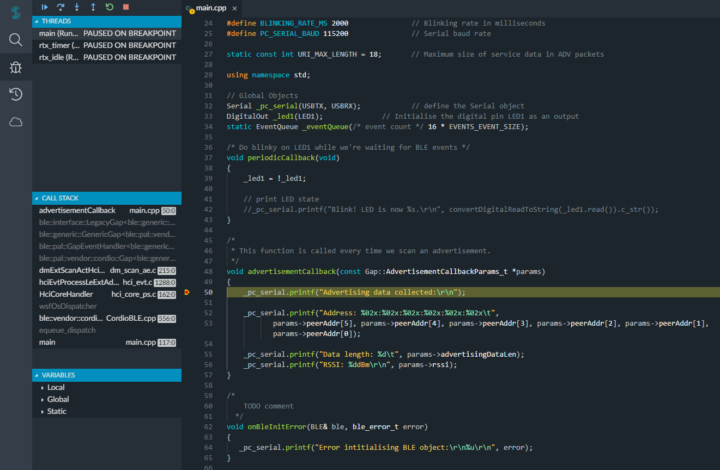
Debugging work with a single click, which is nice:

A first project
Flashing the bootloader
Running Mbed projects on this development kit requires the ARM DAPLink bootloader to first be installed on the board. The latest bootloader binary is available here. Press and hold the reset button, and turn the device on. It should mount as a mass storage device called “BOOTLOADER”, allowing you to copy the bootloader binary onto it. Note sometimes you have to delete the files from it to free up enough space. Once the copy has completed the LED should rapidly flash, and you can power-cycle the device to put it back into normal mode.
Building an Mbed-OS project
There are example projects on the Mbed pages, but they’ll quite complex as first examples go. So let’s create a basic project that demonstrates BLE and the serial connection, which is invaluable for communicating between the DK and a computer.
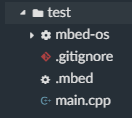
Creating an empty project makes a new folder with the mbed-os library and the main C++ class:

It’ll take a little while to import the required mbed-os library. Imports and builds have a pop-up progress tracker in the bottom-right:

If you want to get going straight away, here’s an example application that blinks LED1 and outputs to the serial terminal (baud rate #defined to 115200):
#include "mbed.h"
#include "platform/mbed_thread.h"

// define the Serial object
Serial pc(USBTX, USBRX);

// Blinking rate in milliseconds
#define BLINKING_RATE_MS 2000

// Serial baud rate
#define PC_SERIAL_BAUD 115200

int main()
{
    // Initialise the digital pin LED1 as an output
    DigitalOut led(LED1);

    // setup serial connection
    pc.baud(PC_SERIAL_BAUD);

    // Print something over the serial connection
    pc.printf("Running main loop.\r\n");

    while (true) {
        led = !led;
        thread_sleep_for(BLINKING_RATE_MS);
        pc.printf("Blink! LED is now %d\r\n", led.read());
    }
}
To build it, copy and paste the above into the main.cpp class, build and run it on the NRF DK. A first build, or a clean build, was slow on my laptop, presumably as it has to build and link the required libraries. Maybe it’s not just my laptop, as build progress is reported down to decimal percentages:

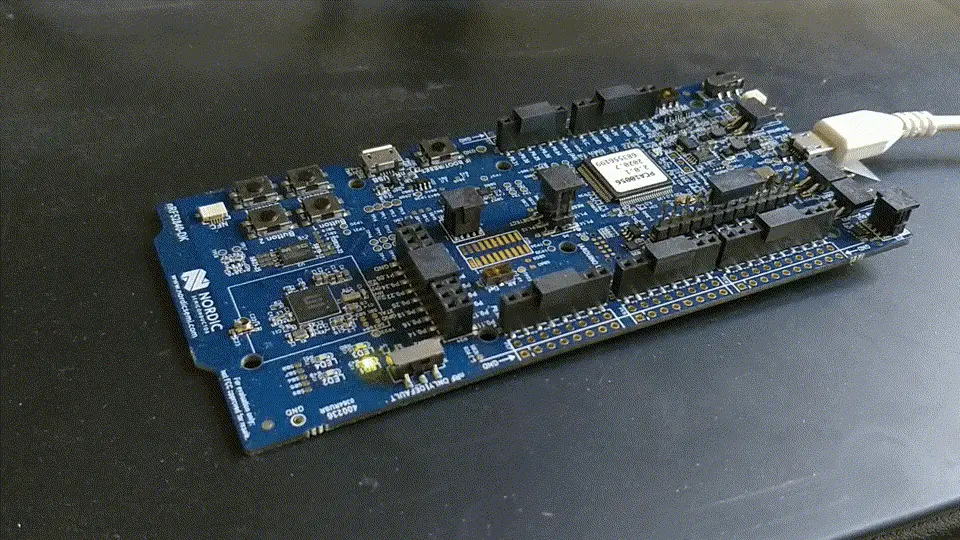
Thankfully, subsequent builds are much quicker. When the application is launched the serial monitor window should automatically open, all you need to do is set the baud rate to the value from the program, 115200. You should see a message every two seconds, in time with the blinking LED1:

Running main loop.
Blink! LED is now 1
Blink! LED is now 0
Blink! LED is now 1
Blink! LED is now 0
A BLE scanner application
Version 1.0: The Simplest Way
Okay, so we can build and run an application that uses the LEDs and the serial connection, so let’s get going with BLE. The below code is a a minimal BLE scanning app, which receives and processes BLE advertising packets. It uses the old way of setting up and kicking off a scan, which is now deprecated but is much more simple than the new method.
It sets up the BLE device and the scan parameters, and kicks off a scan. When an advertising packet is received, the function advertisementCallback is called to process the packet. In this case, we just print the address.
// Platform Libs
#include <events/mbed_events.h>
#include <mbed.h>
#include "ble/BLE.h"

// Constants
#define BLINKING_RATE_MS 500               // Blinking rate in milliseconds
#define PC_SERIAL_BAUD 115200               // Serial baud rate
static const int URI_MAX_LENGTH = 18;       // Maximum size of service data in ADV packets

// Global Objects
Serial _pc_serial(USBTX, USBRX);            // define the Serial object
DigitalOut _led1(LED1);              // Initialise the digital pin LED1 as an output
static EventQueue _eventQueue(/* event count */ 16 * EVENTS_EVENT_SIZE);

/* Do blinky on LED1 while we're waiting for BLE events. Called every BLINKING_RATE_MS */
void periodicCallback(void)
{
    _led1 = !_led1;
}

/*
 * This function is called every time we receive an advertisement.
 */
void advertisementCallback(const Gap::AdvertisementCallbackParams_t *params)
{
    _pc_serial.printf("Address: %02x:%02x:%02x:%02x:%02x:%02x, RSSI: %ddBm\t\r\n", params->peerAddr[5], params->peerAddr[4], params->peerAddr[3], params->peerAddr[2], params->peerAddr[1], params->peerAddr[0], params->rssi);
}

/*
 *   Called if there's an error initialising the BLE instance
 */
void onBleInitError(BLE& ble, ble_error_t error)
{
   _pc_serial.printf("Error intitialising BLE object:\r\n%u\r\n", error);
}

/*
 *   Called when the BLE instance is intialiased
 */
void bleInitComplete(BLE::InitializationCompleteCallbackContext *params)
{
    BLE&        ble   = params->ble;
    ble_error_t error = params->error;

    if (error != BLE_ERROR_NONE) {
        onBleInitError(ble, error);
        return;
    }

    if (ble.getInstanceID() != BLE::DEFAULT_INSTANCE) {
        return;
    }

    /*
        DEPRECATED BUT EASY WAY OF STARTING A SCAN
     */
    ble.gap().setScanParams(1800 /* scan interval */, 1500 /* scan window */, true /* active scanning */);
    ble.gap().startScan(advertisementCallback);
}

 /*
    Setup the callback method on the event queue
  */
void scheduleBleEventsProcessing(BLE::OnEventsToProcessCallbackContext* context) {
    //BLE &ble = BLE::Instance();
    _eventQueue.call(Callback<void()>(&context->ble, &BLE::processEvents));
}

// Main method sets up peripherals, runs infinite loop
int main()
{
    // setup serial connection
    _pc_serial.baud(PC_SERIAL_BAUD);

    // Print something over the serial connection
    _pc_serial.printf("Serial link setup.\r\n");

    // setup BLE object
    // add LED blinking to the events queue
    _eventQueue.call_every(BLINKING_RATE_MS, periodicCallback);

    // instantiate the BLE object
    BLE &ble = BLE::Instance();
    ble.onEventsToProcess(scheduleBleEventsProcessing);
    ble.init(bleInitComplete);

    // Run
    _pc_serial.printf("Setup done. Running.\r\n");
    _eventQueue.dispatch_forever();

    return 0;
}
Version 2.0: using the latest API calls
The problem with the above approach is that the API calls used to kick off a scan are now deprecated. There’s no equivalent simple example project on the mbed Github, so I instead took this example application and stripped it down to be as simple as possible.
The new class uses an inner class to represent a scanner instance, which uses the latest API calls for setting up and kicking off a scan. So now we can build it without any warnings. Here’s the code:
/*
    Example BLE scanning application
 */
// Platform Libs
#include <events/mbed_events.h>
#include <mbed.h>
#include "ble/BLE.h"

// Constants
#define BLINKING_RATE_MS        500               // LED blinking rate in milliseconds
#define PC_SERIAL_BAUD          115200            // Serial baud rate

/*
    Active scanning sends scan requests to elicit scan responses
 */
#define ACTIVE_SCANNING         true

/*
    Scan interval is the time it waits on a single advertising channel
 */
#define SCAN_INTERVAL           1000

/*
    From the API documentation:
    The scanning window divided by the interval determines the duty cycle for scanning. For example, if the interval is 100ms and the window is 10ms, then the controller will scan for 10 percent of the time. It is possible to have the interval and window set to the same value. In this case, scanning is continuous, with a change of scanning frequency once every interval.
 */
#define SCAN_WINDOW             1000

// Global Objects
static EventQueue event_queue(/* event count */ 16 * EVENTS_EVENT_SIZE);
Serial _pc_serial(USBTX, USBRX);            // define the Serial object

/*
    Inner scanner class
 */
class BLEScanner : ble::Gap::EventHandler {

public:
    // constructor
    BLEScanner(BLE &ble, events::EventQueue &event_queue) :
        _ble(ble),
        _event_queue(event_queue),
        _alive_led(LED1, 1) { }

    // destructor
    ~BLEScanner() { }

    // scan method
    void scan() {
        // sets the instance of the scanner class as the event handler
        _ble.gap().setEventHandler(this);

        // Initialise the BLE stack, start scanning if successful
        _ble.init(this, &BLEScanner::on_init_complete);

        // add the LED blinker as a recurring event on the event queue
        _event_queue.call_every(BLINKING_RATE_MS, this, &BLEScanner::blink);

        // run infinitely
        _event_queue.dispatch_forever();
    }

// Private scanner class variables and methods
private:
    // private global scanner variables
    BLE &_ble;
    events::EventQueue &_event_queue;
    DigitalOut _alive_led;

    /** Callback triggered when the ble initialization process has finished */
    void on_init_complete(BLE::InitializationCompleteCallbackContext *params) {

        // report error or success
        if (params->error != BLE_ERROR_NONE) {
            _pc_serial.printf("Ble initialisation failed.");
            return;
        }

        _pc_serial.printf("Ble initialisation complete.");

        // setup scan with custom parameters
        ble::ScanParameters scan_params;
        scan_params.set1mPhyConfiguration(ble::scan_interval_t(SCAN_INTERVAL), ble::scan_window_t(SCAN_WINDOW), ACTIVE_SCANNING);
        _ble.gap().setScanParameters(scan_params);

        // start scanning
        _ble.gap().startScan();
    }

    // Blink the alive LED
    void blink() {
        _alive_led = !_alive_led;
    }

    // Called on receipt of an advertising report
    void onAdvertisingReport(const ble::AdvertisingReportEvent &event) {

        // get the address and RSSI from the event
        ble::address_t address = event.getPeerAddress();
        ble::rssi_t rssi = event.getRssi();

        // print it out
        _pc_serial.printf("Received advertising data from address %02x:%02x:%02x:%02x:%02x:%02x, RSSI: %ddBm\r\n", address[5], address[4], address[3], address[2], address[1], address[0], rssi);

                  // Use the below to get to the actual advertising data
                  //ble::AdvertisingDataParser adv_data(event.getPayload());
   }
}; /*  /Inner scanner class */

/** Schedule processing of events from the BLE middleware in the event queue. */
void schedule_ble_events(BLE::OnEventsToProcessCallbackContext *context) {
    event_queue.call(Callback<void()>(&context->ble, &BLE::processEvents));
}

// Main method sets up peripherals, runs infinite loop
int main()
{
    // setup serial connection
    _pc_serial.baud(PC_SERIAL_BAUD);

    // create BLE instance
    BLE &ble = BLE::Instance();

    // attach the callback to the event queue
    ble.onEventsToProcess(schedule_ble_events);

    // Setup scanner instance
    BLEScanner scanner(ble, event_queue);

    // Run the scanner
    _pc_serial.printf("Setup done. Running.\r\n");
    scanner.scan();
    return 0;
}
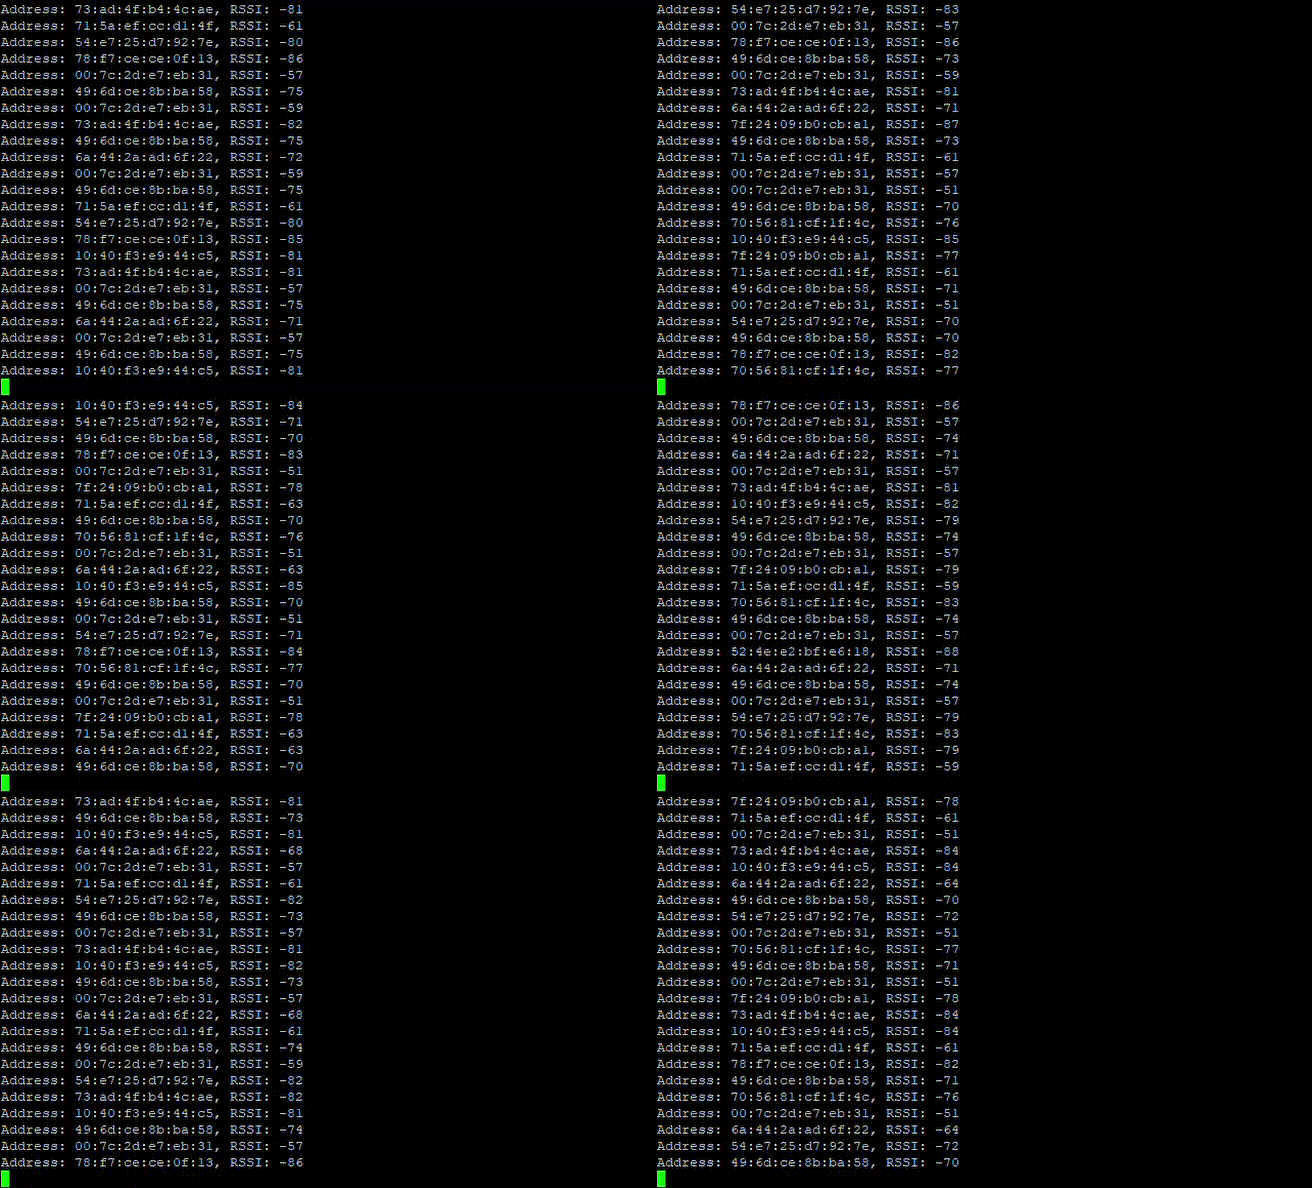
This program collects advertising packets into an event queue event_queue, which manages regular events such as blinking the LED and processing packets. Received advertising packets are fed to the function onAdvertisingReport, which unpacks the event and simply prints the device addresses and signal strength over the serial terminal:

Conclusion
Hopefully this is a useful resource for anyone who wants to get going with embedded development and BLE. There is a lot of material online, but it can be very dense and hard to find. We’re aiming to have some future blogs detailing what we’ve built, so stay tuned.
For our latest research, and for links and comments on other research, follow our Lab on Twitter.